
My preferred way of tying Sparkle Gnats and Griffiths Gnats has long been to wrap the body herl and hackle around the thread before winding the whole lot up the shank to form the body. There are a few advantages to doing it this way 1. It makes a stronger body. 2. If you use a good genetic hackle and just palmer it up the body it can act like a propeller and impart a lot of spin to the fly…. not good…. wrapping the hackle around the thread prevents this. and 3. The hackle footprint is a good bit more messy, like the fly in general, I like the slightly more chaotic look of the fly.
Tying the really small ones has never been impossible with this method but there’s no doubt a really fine strong thread makes tying them a lot easier. In the past I used Nano Silk or Moser Power Silk but with the release of Nano Silk Ultra 30D I’ve found a new thread for them that makes the tying just that little bit simpler. The strength and range of colours on this thread also makes adding a tag that colour matches the shuck a breeze and with the fine applicator nozzle that comes with Clear Cure Goo Hydro adding a bit of strength and translucency to the tag and start of the shuck is a lot less messy too. Win win situation. I wont make any bold claims that this tag massively improves what was already a great fly pattern but to my mind it cant hurt.
So on to the tying.
Sparkle Gnat.
Hook: Size to suit your needs anything from a #12 to as small as you can buy. For the step by step I’ve used a TMC 103 #19 as it makes photographing the steps easier but the group picture has colour variations and hook sizes from #18 to #24.
Thread: Semperfli Nano Silk Ultra 30D, colour to suit.
Shuck: Hends Body Quill’s or a substitute like Vampire Blob Tail works almost as good, colour to suit. I also leave the tag end of the thread as part of the shuck.
Tag: Tying thread built up to rounded bump.
Tag coating: Clear Cure Goo Hydro, let run a little onto the shuck before curing.
Body: Peacock Herl, natural or dyed to suit your colour scheme.
Hackle: Grizzle or any colour to suit your colour scheme. For the step by step I used Olive dyed badger but in the examples I’ve also used Grizzle and Cree.
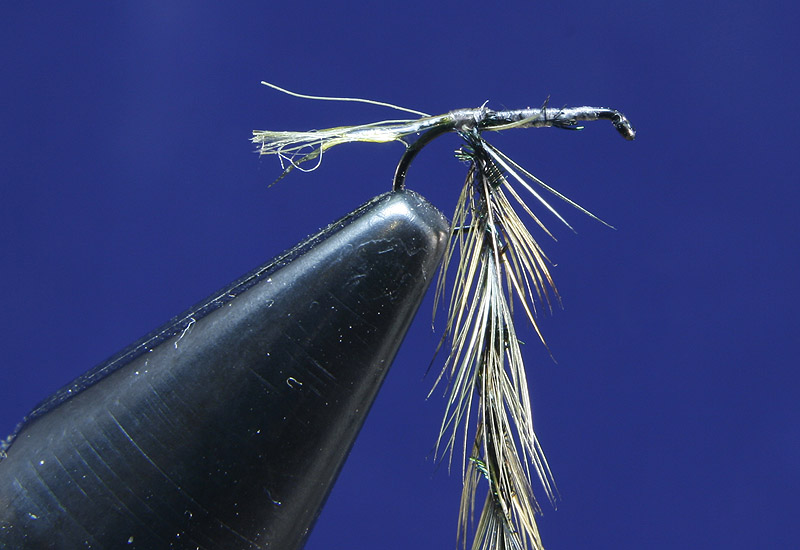
Step one: Attach the thread and wind it back to a point just behind the point of the hook.
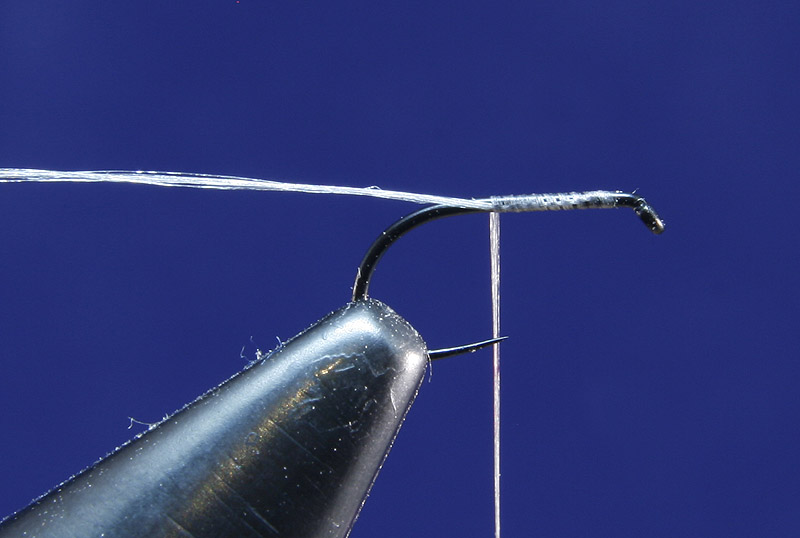
Step two: Catch in an inch or so of the body quill shuck material at the central point leaving half pointing forward over the eye. Fold this back over to form a double layer of the shuck material, where the doubled shuck material forms a bump near the hook bend accentuate this with more thread wraps before applying a light coating of Clear Cure Goo Hydro over the thread bump and a little onto the start of the shuck.
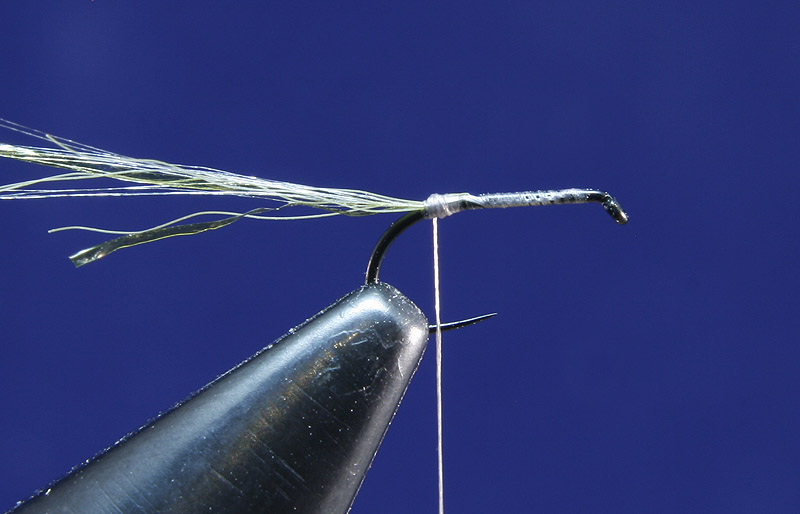
Step three: Tie in a single Peacock fibre and a cock hackle at the point where the “bump” thins down to the hook shank and after binding them down along the hook shank return the thread back to the body material tie in point. It’s important to make sure you tie both materials in at the exact same point and also return the thread to this same point as well, when twisting the materials around the thread if they’re not all coming from the same point on the hook shank it creates a stress point on the materials… not such a massive deal with the hackle but for a more delicate material like the Peacock Herl it can easily cause it to break.
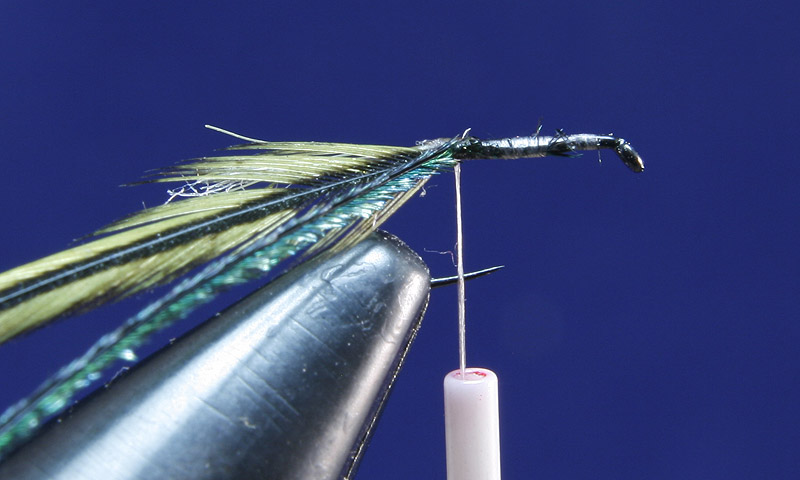
Step four: Twist the Peacock Herl around the thread in tight close turns followed by hackle in wider more open turns.
A bit closer up.
Step five: Wrap your combined thread, herl and hackle to the eye of the hook in close turns, seperate the thread from the other materials and bind them down with a couple of thread turns before trimming of the waste and making your whip finish.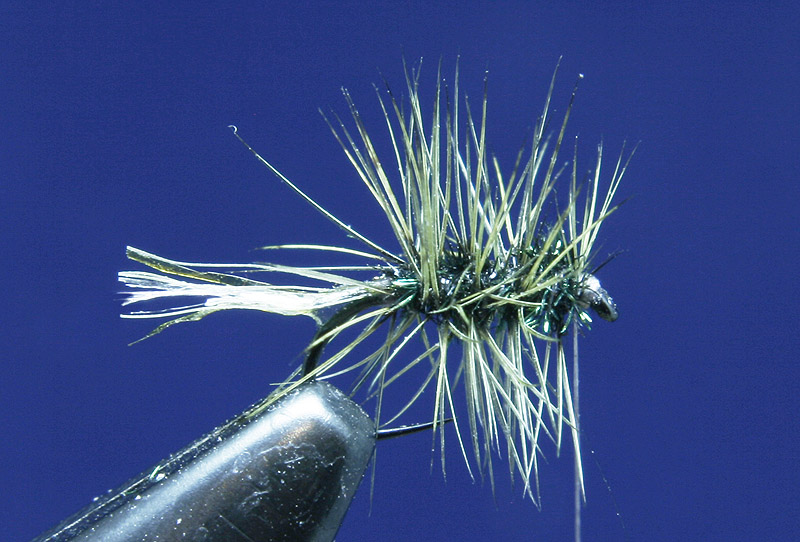
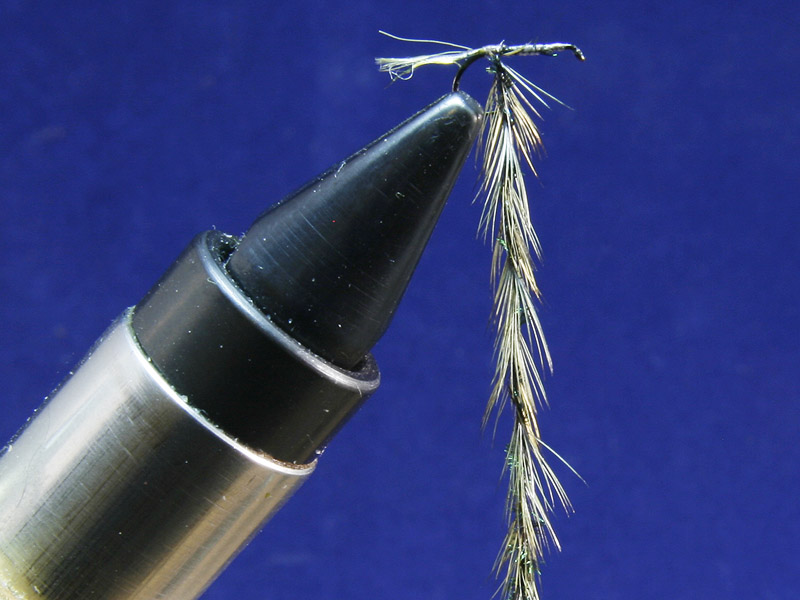
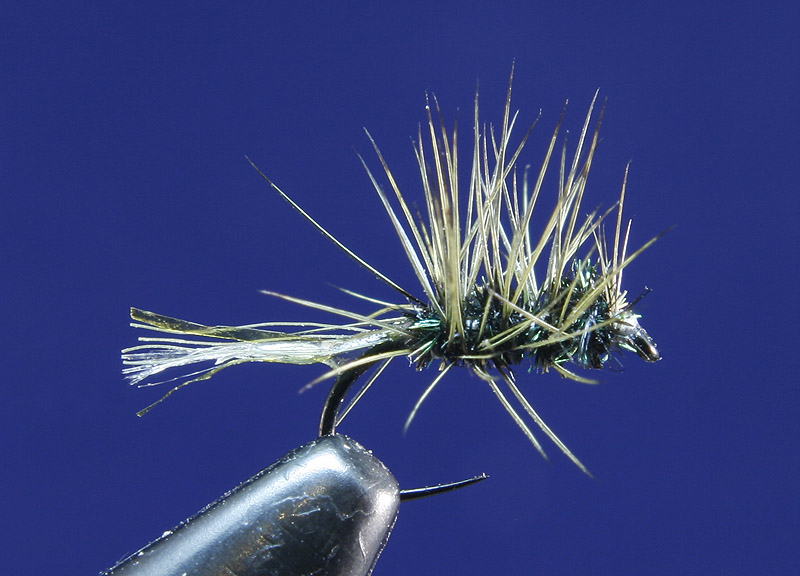
Step six: Brush the hackle fibres upwards on both sides of the hook before cutting off any fibres still pointing down below the hook shank. Some of the brushed up fibres will return to somewhere near their original position and you can, if you like, trim these off. It’s not necessary though as they’ll be fibres from the side of the shank rather than underneath and wont affect how the fly fishes.
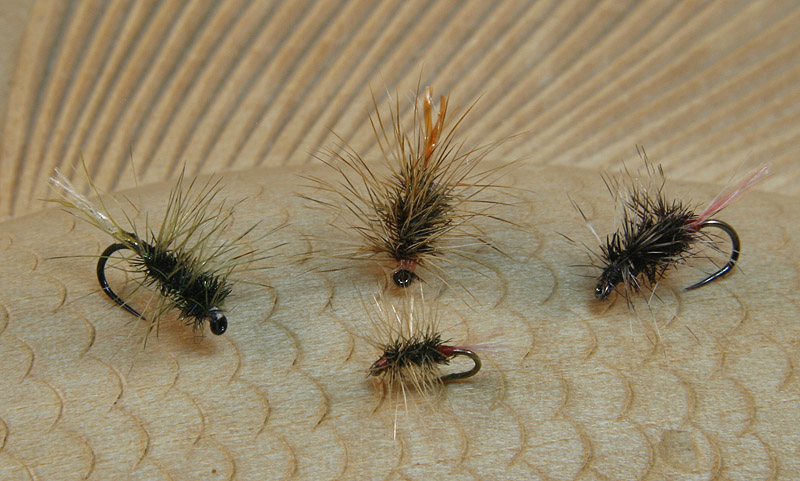
The finished fly alongside a few colour variations, these are on hooks from #18 – #24.
Jim
Quality flees Jim, and even better images!!
Cheers Stephen, looking forward to seeing your black versions.