
Probably my all time favourite fly, since it first found its way into my fly box well over 20 years ago it’s caught me more fish than any other fly I tie. If I was allowed one fly and one fly only I would take this one. Created by Craig Mathews it’s an evolution of Caucci & Nastasi’s Comparadun which in turn is an evolution of Fran Betters’ Haystack, in terms of translucency of the shuck though it’s very similar to Fran Betters’ Usual. Not a bad heritage all in.
My tying of the Sparkle Dun has evolved itself through the years, sometimes by design and sometimes by accident where I’ve tied a few flies in a hurry to get out on the water and the bits I’ve got “wrong” have actually turned out to help its catch rate. The original dressing has and will continue to catch fish worldwide so what have I changed and why? I’ll explain that later, for now we’ll get straight to tying the fly, this particular colour and size suits the Baetis Rhodani (Large Dark Olive).
Sparkle Dun.
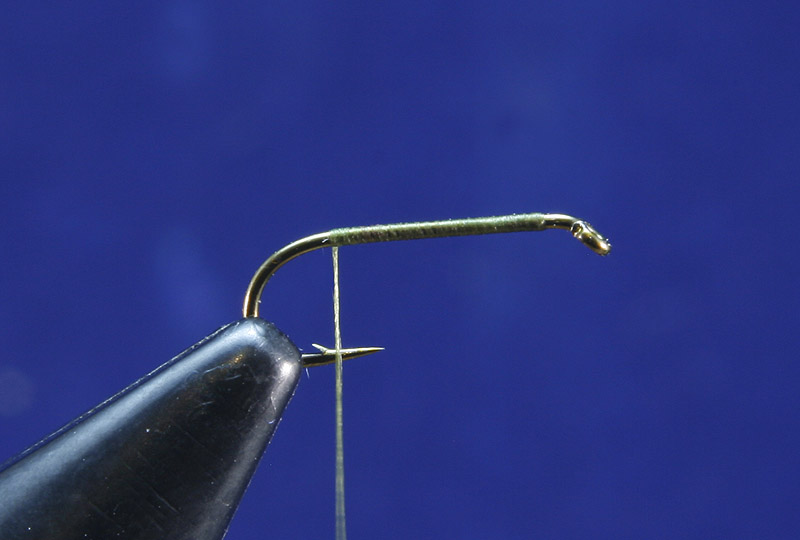
Hook: TMC100 #16
Thread: Benecchi 12/0 Olive
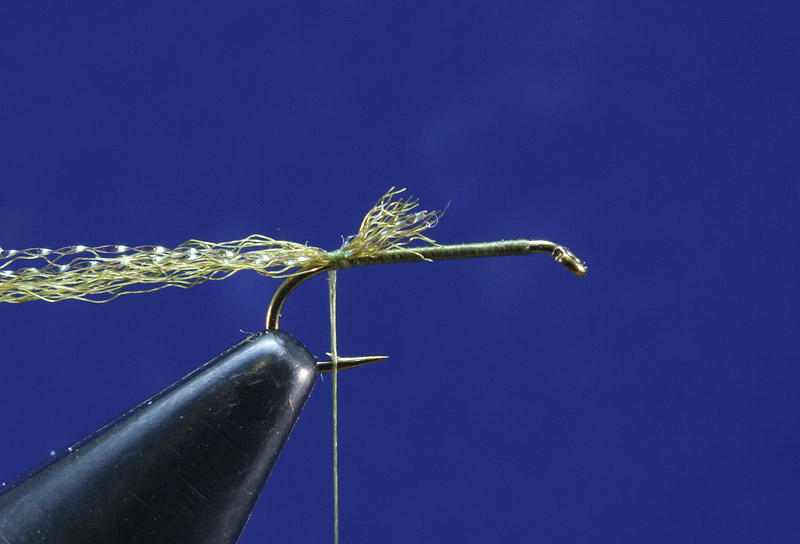
Shuck: Antron Yarn PMD Shuck with 2 strands of Midge Flash Root Beer (The midge flash is optional and on smaller flies I’ll substitute Angel Hair or just leave out the flash altogether)
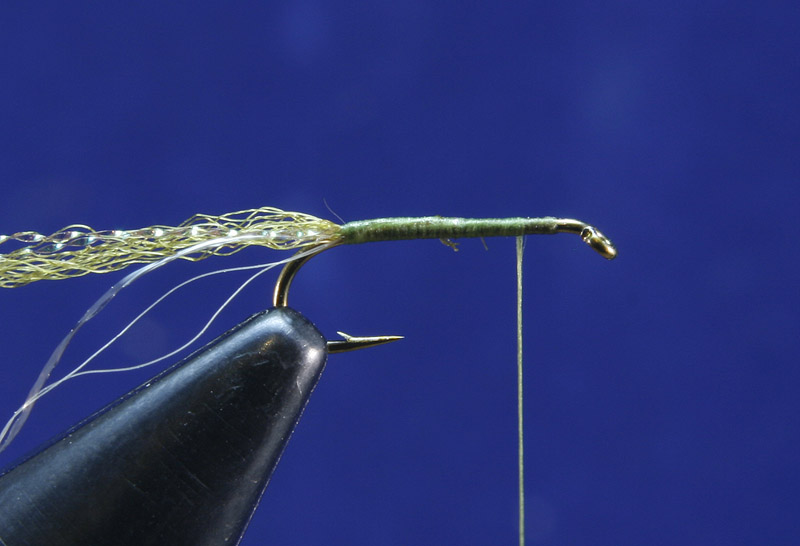
Rib: Hends Body Quills BQ-11 Lt Olive Brown
Wing: Deer Hair, see note below.
Sighter: TMC Aero Dry Wing, colour to suit (Optional)
Body: Beaver dubbing, Grey/Olive blend
Note on winging hair: The best hair for Sparkle Duns is fine tipped hollow Deer hair, I’ve found some Coastal Deer to be ideal but the best advice I could give is to ignore the label on the packets and check out the hair itself. Try to find hair that’s hollow as far up to the tip as you can and has as short a “tip hair” as you can find. All Deer hair fibres have a really fine solid hair at the tip after the hollow part ends just try your best to keep this short. A really clean hair with little underfur, good flare properties and an overall short even length to the fibres will make your tying go a lot easier.
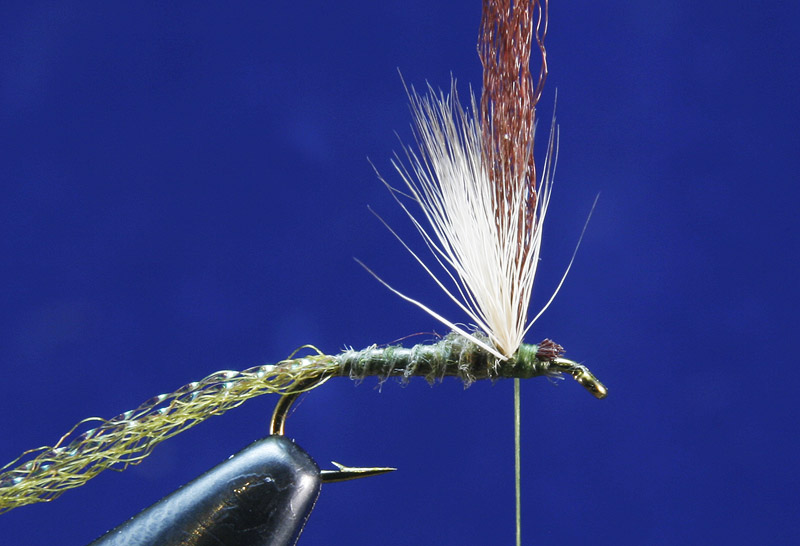
Step one: Wrap a layer of thread in touching turns to the point of the hook shank just before it starts to bend.
Step two: Add the shuck materials, making sure you keep them on top of the hook shank. Trim the waste at the mid point of the shank, the butt ends of the wings will be cut here too.
Step three: Tie in the rib material and cover up the waste ends of the shuck material with thread wraps, stopping your thread a quarter of the shank length back from the eye.
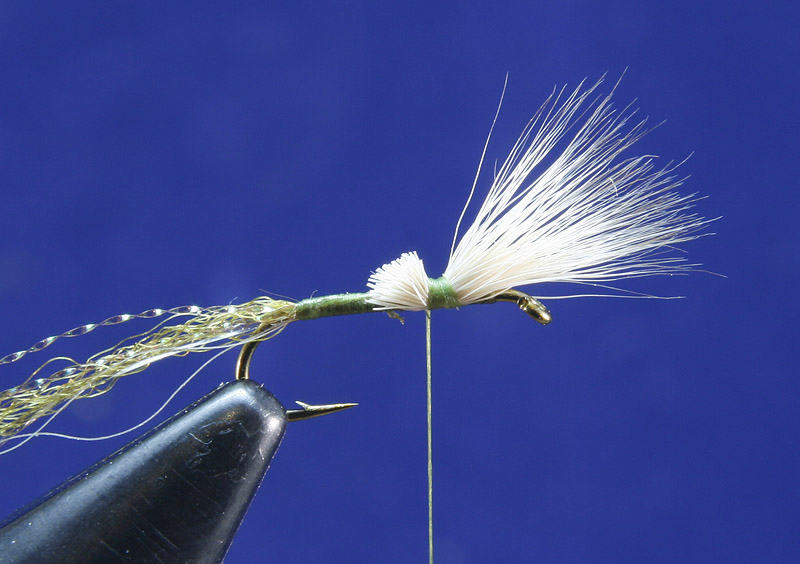
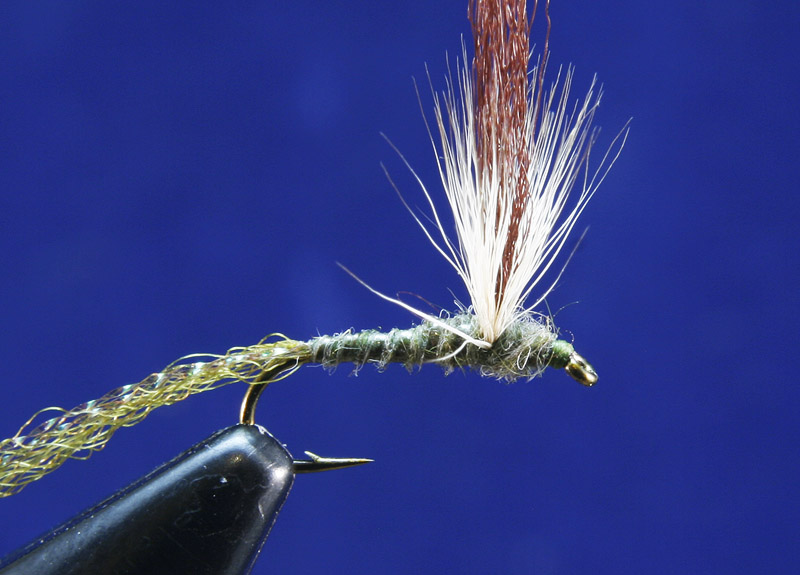
Step four: Cut a small bunch of Deer hair, clean out all the underfur and stack the tips. The version in this step by step is one I use in the early season when the light is at a low angle so a contrast of bleached Deer hair and Dark Brown or Black Aero wing is easier to see, as is Pink Aero wing on a darker hair. Tie the fly whatever way suits your vision and light conditions or for a more natural fly just use Natural or dyed Grey hair. Measure the wing to be the same length as the hook shank and bind down keeping all the hair fibres on the top of the shank and using tight turns towards the rear of the hook. It’s easiest if you keep a tight grip of the butt ends of the hair and cut the waste ends short and at an angle to blend them into the body of the fly, I’ve just let go before trimming here to photograph the step and to show how out of scale the butt ends can look at this point…. don’t worry about that all that should concern you is the density of the finished wing.
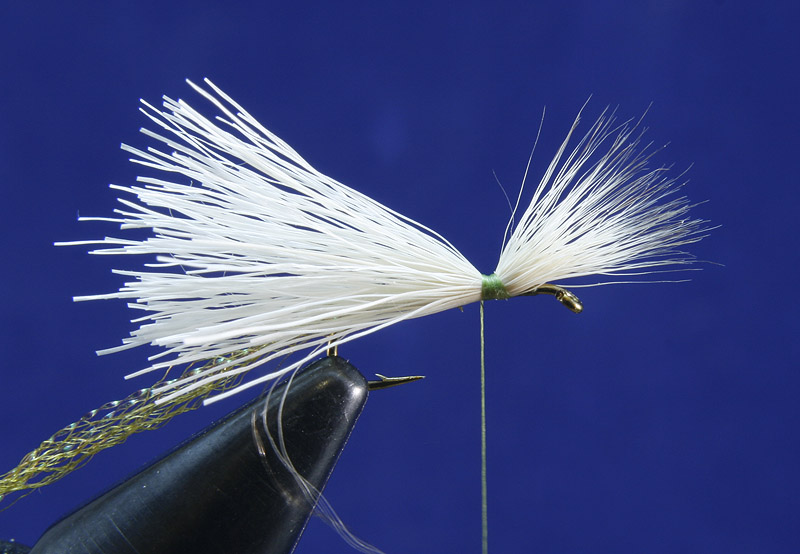
Step five: The trimmed butt ends of the hair showing the angled cut and how the length matches the point where you previously trimmed the shuck materials.
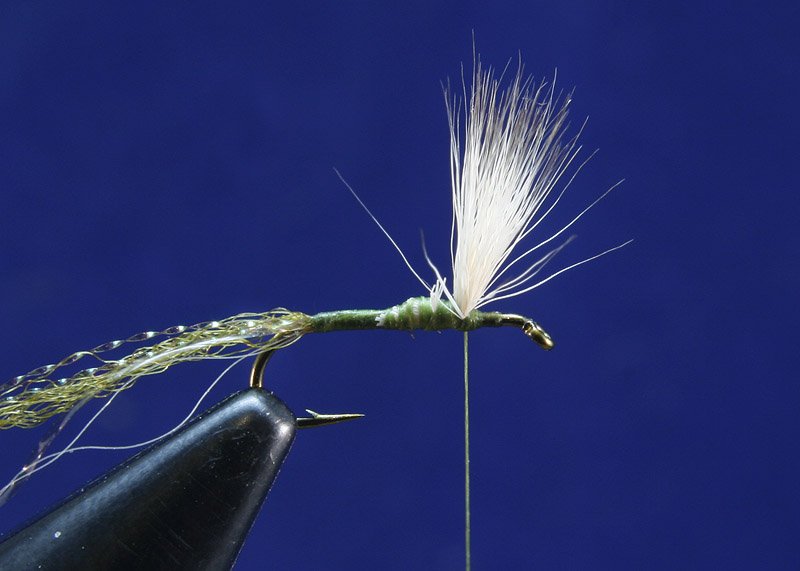
Step six: Tightly bind down the butt ends of the wing before moving the thread forward and making a few tight wraps directly in front of the wing at the root of the fibres.
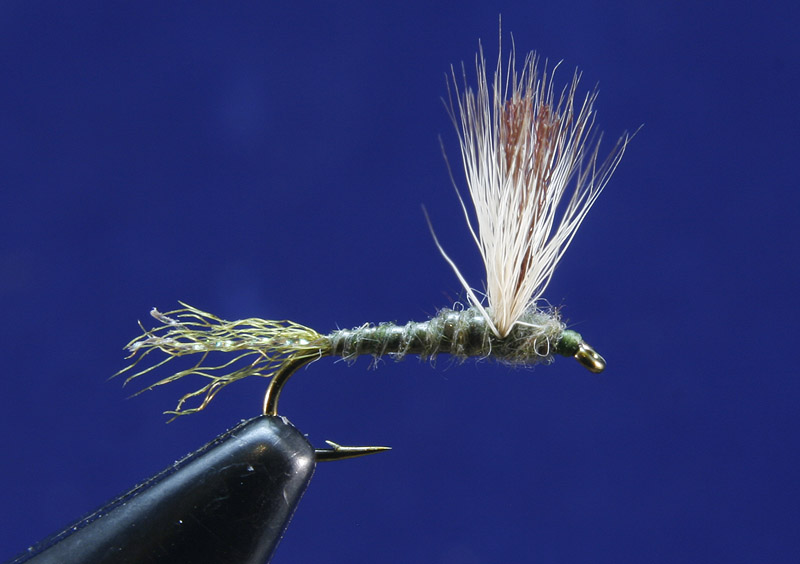
Step seven: Add a little dubbing to the thread in a fine noodle, don’t worry about the dubbing being tight up the thread to the hookshank as you’ll use this section of bare thread to go back to the rear of the hook and ensure your dubbing is starting right at the shuck. Doing it this way is more accurate, save build up from dancing the thread on the spot and stops you from making the dubbing loose when you slide it up the thread.
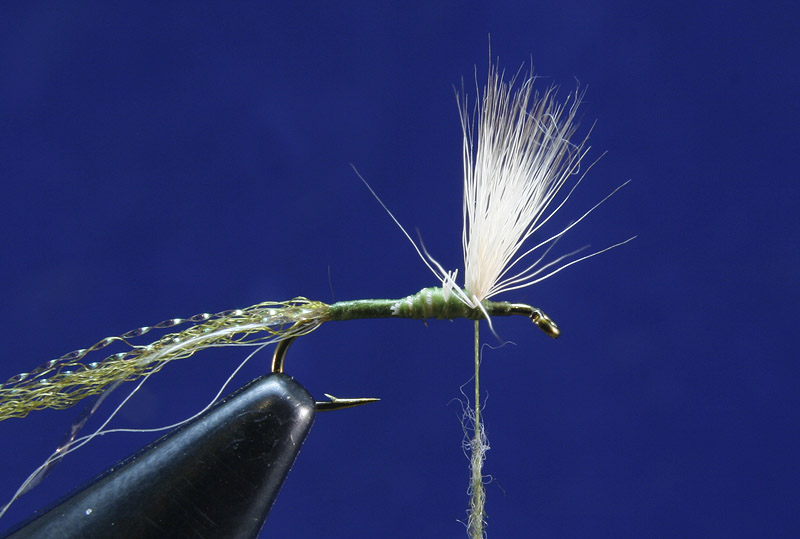
Step eight: Dub up the body to the wing root leaving your thread in front of the wing.
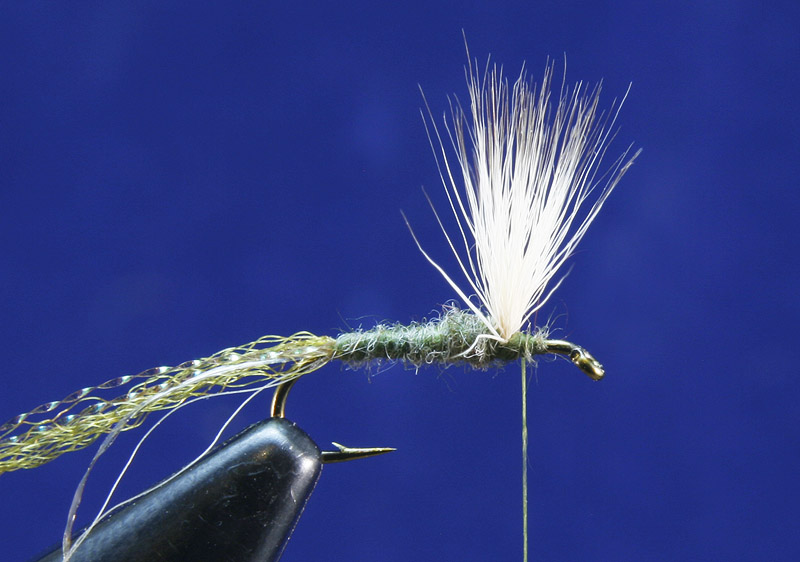
Step nine: Follow the dubbing with tight close turns of the rib, the effect you’re after here i that the dubbed body looks more like the rib than the ribbing material does as this will help your fly keep a better profile through the flies lifespan. This is optional and if you prefer a rougher looking body you can leave out the rib altogether. When you tie it off in front of the wing tie in your sighter post and trim the waste end, again this is optional.
Step ten: Add a little more dubbing to form the thorax starting with a couple of figure eight turns around the wing roots before dubbing up to the eye and making your whip finish.
Step eleven: Trim the sighter post slightly shorter than your Deer hair wing length and trim the shuck slightly shorter than the length of your hook shank to finish the fly. For a more effective and natural looking fly dont cut the shuck with a single straight cut, instead roll up the shuck between your fingers to a tight cord and using sharp scissors saw at the cord roughly over a few millimeters to leave a tapered final cut end.
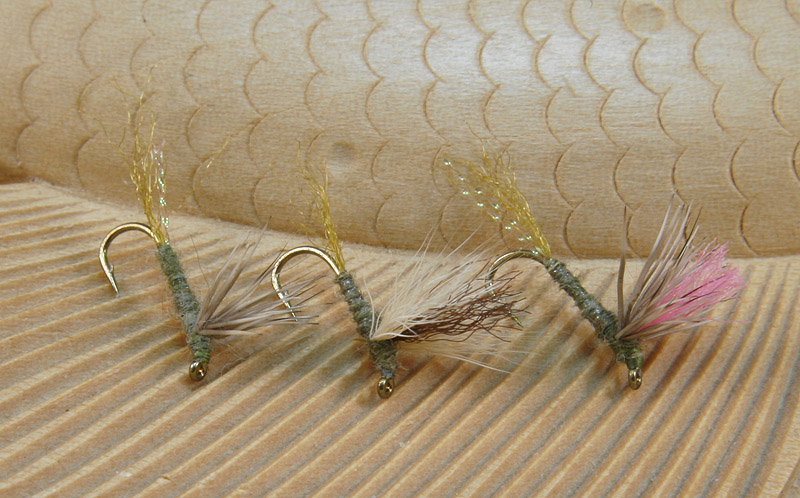
A few variations of the finished fly.
Showing different sighters as well as a more natural looking wing, an unribbed body and a shuck with no flash.
So the changes I’ve made and why…. The shuck was originally made from Z-Lon, the reasons being that Z-Lon will not clump together as much as Antron would and that Z-Lon floats better. When I tied some with Antron I noticed the fly got more effective the longer I fished it, what was happening was the shuck was starting to ride up at about a 20 degree angle and the fly was sinking a little at the rear end with the end of the shuck still being in the film or on the surface giving the fly a profile and attitude that more closely matched hatching upwings. The wing was originally tied to fan out 180 degrees and was tied in with a few turns through the wing material to help it stay upright rather than sloping forward through use, I’ve found it to be much more effective when tied to fan out 120 degrees at the very most and when the locking turns through the wing are left out it will gradually slope forward a little as the fly gets used. On it’s own I don’t think this would be good but when combined with the changed shuck it just lets the fly sink that tiny bit more into the film and with the rear of the hook sinking slightly more the wing sloping forward, again very slight, means the fly fishes in the surface in a very wide V shape and the wing looks upright. I think this leaves you with a more natural looking fly as its fished and for me personally it fishes a lot better. The original fly is a great pattern though so why not tie up a few of both and see what suits you and the conditions you use the fly under.
Jim