
In a previous post I went through the steps for creating extended fly bodies. Now it’s time to use them on a Daddy Long legs and a quick simple Danica Mayfly pattern, starting with the Daddy Long Legs.
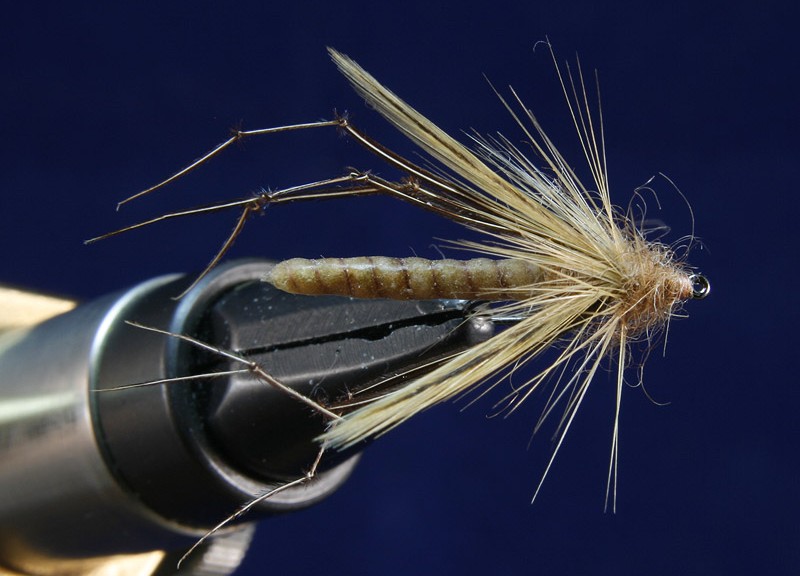
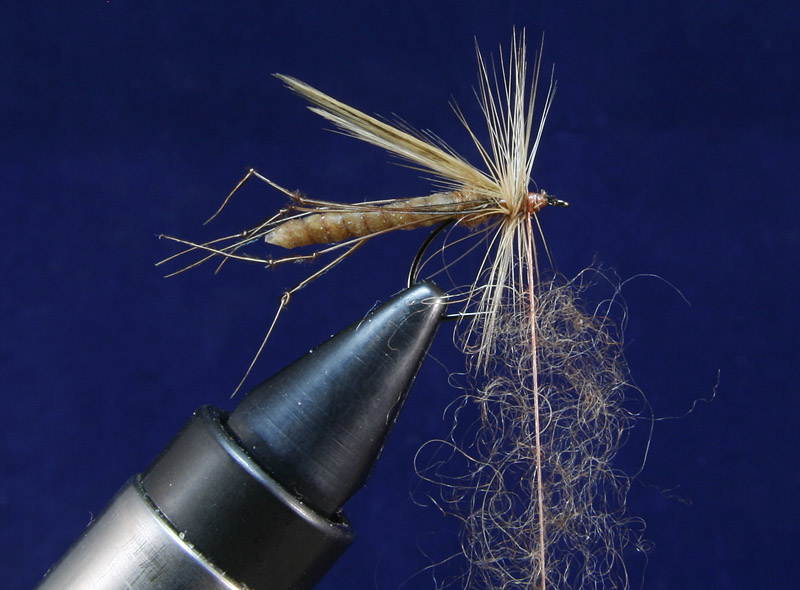
Daddy Long Legs
Hook: Varivas IWI T2000 Terrestrial #12.
Thread: Nano Silk, Copper.
Body: Copydex extended body.
Thorax: Coarse dubbing, colour to match the extended body.
Legs: Knotted Pheasant tail.
Wings: Honey cock hackle tips.
Hackle: Honey cock.
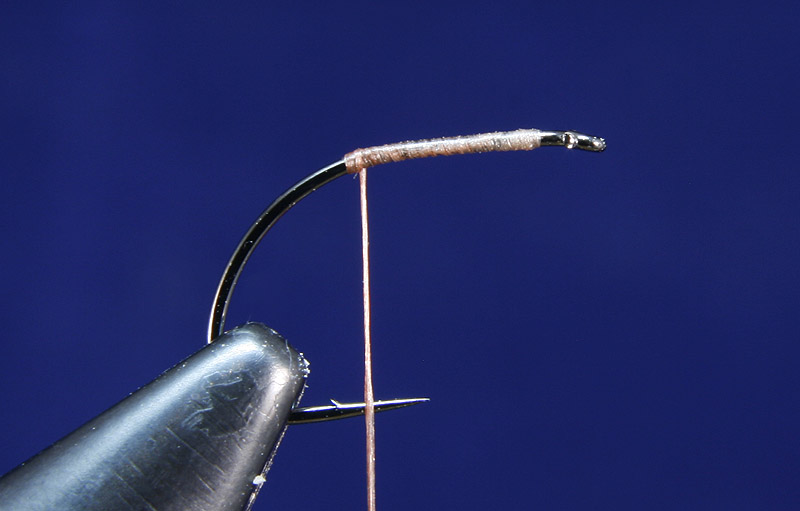
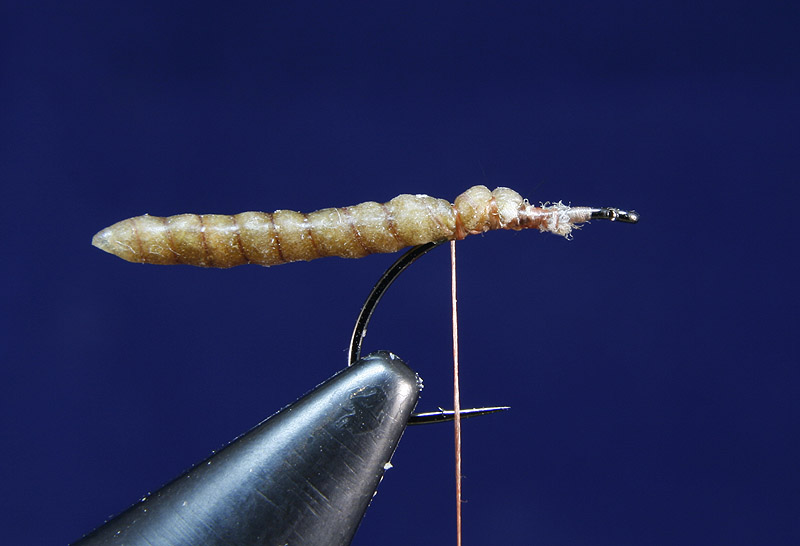
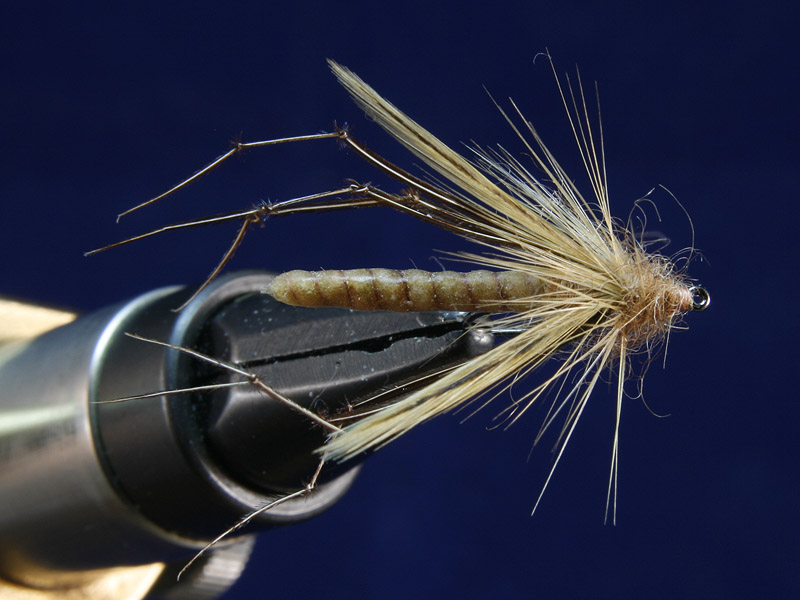
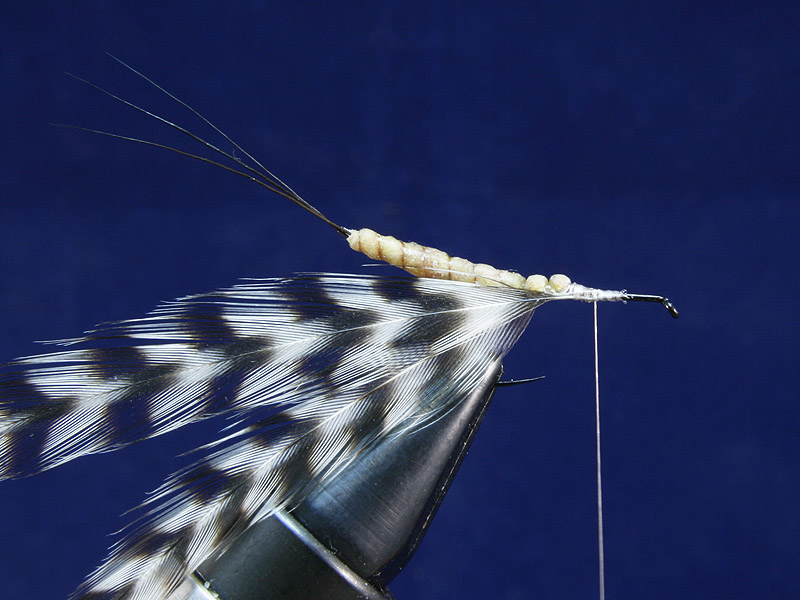
Step 1: Attach the thread to the hook and wind back over the straight part of the shank. I use Nano silk for this fly as you need a good strong thread that will handle a fair amount of pressure when you bind in the extended body, the fine diameter of this thread also helps minimise bulk.
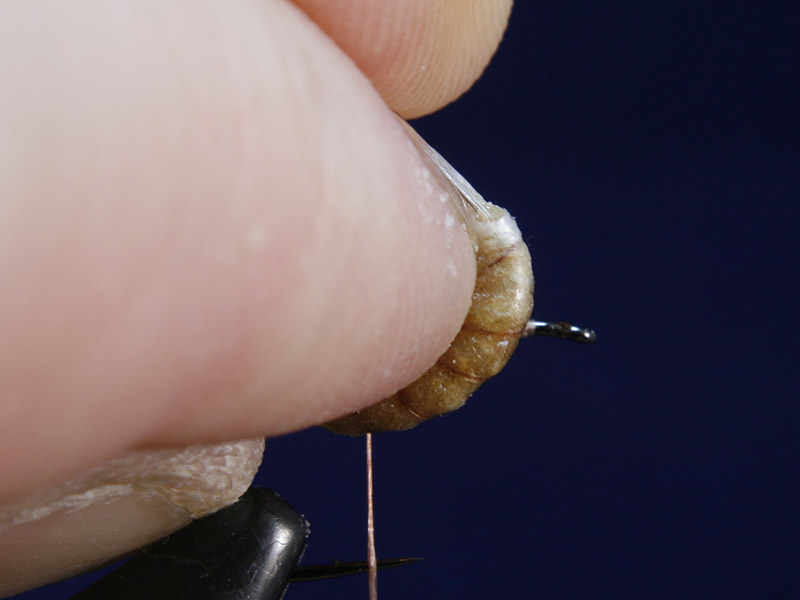
Step 2: Using the thread tags left on your extended body to help with your grip bend the extended body around your forefinger as shown and make an angled cut with your scissors.
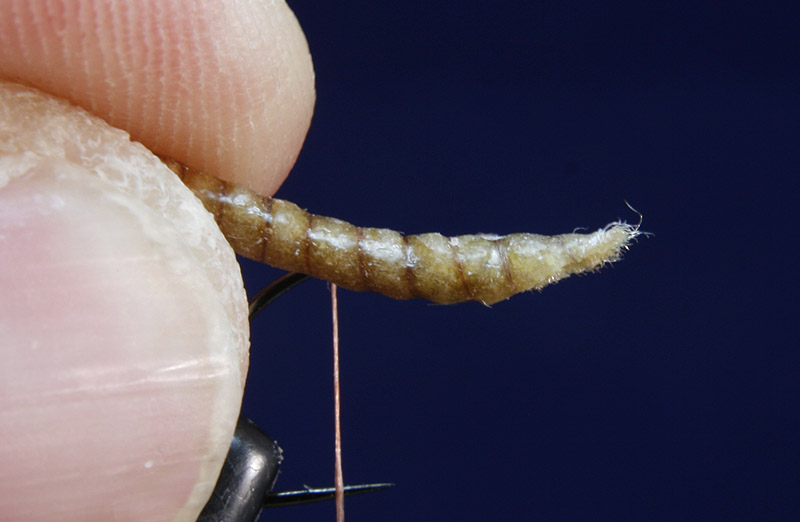
Step 3: Your extended body is now ready to tie on with the angled cut butted up tight against the start of the hook bend.
Step 4: Put a drop of superglue over the end of your thread wraps and bind the body down with a couple of semi tight wraps. Spinning your thread to make sure its tightly corded helps you to apply binding pressure over a smaller area of the body and the superglue, while not strictly neccesary, it helps to prevent the body rolling on the shank during tying of the later steps. Move the thread forward with one open turn below the hook shank and add a few tighter binding wraps then repeat moving forward again, you are looking to achieve a rough “sawtooth” effect as this helps prevent the body from being pulled off the finished fly during fishing. Return the thread to the point of your initial tie in applying more thread pressure on the way back.
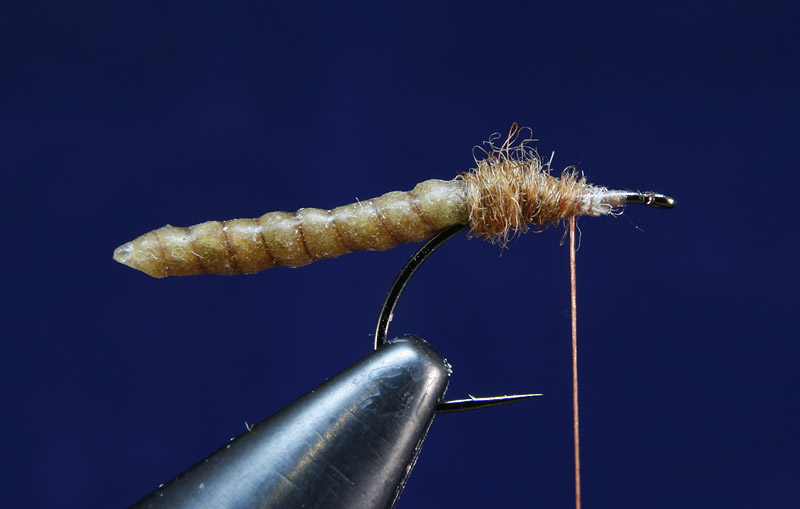
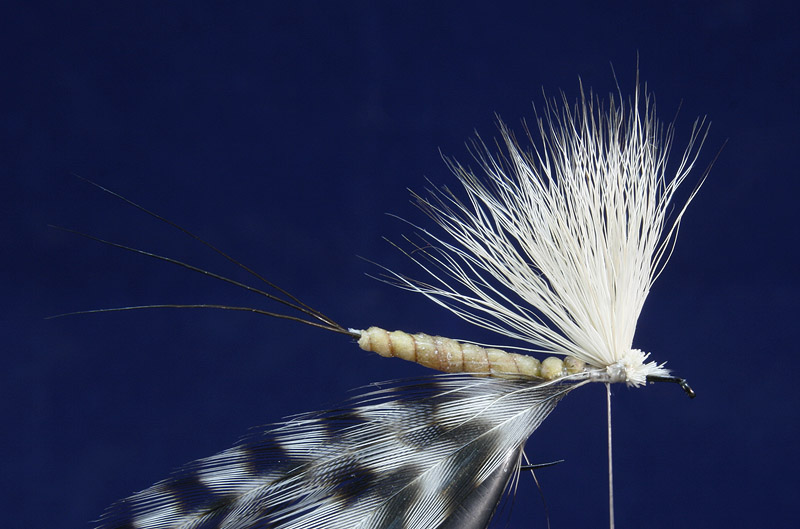
Step 5: Using a coarse dubbing coloured to suit your extended body cover over the tie in points for your extended body. Seals fur is good for this fly but here I have used Camel dubbing which is a very good substitute on these flies.
Step 6: Tie in three knotted Pheasant tail fibres on either side of the hook facing back and extending beyond the length of the extended body. You can tie these in singly with a little dubbing between to make a fly that will look nicer in your box but I have found tying them in this way not only makes the fly simpler to tie but also makes a more effective fishing fly.

Step 7: At the same point tie in two Honey Cock hackle tips flat on the top in a wide V, these should be the length of the body or slightly shorter. These are non genetic feathers from a cape I bought from Cookshill Fly Tying and are ideal for the job.
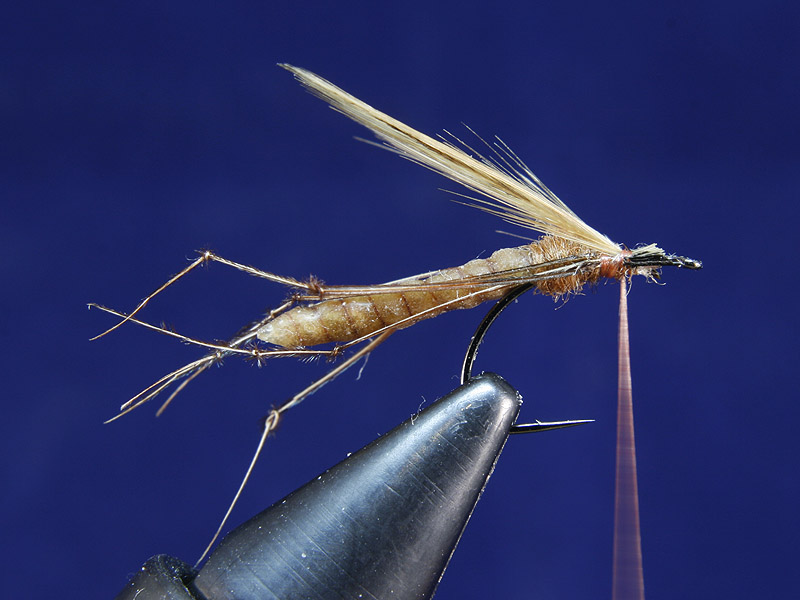
Step 8: The wings shown from above, note the gap left behind the eye when trimming the butt ends of the wing feathers.

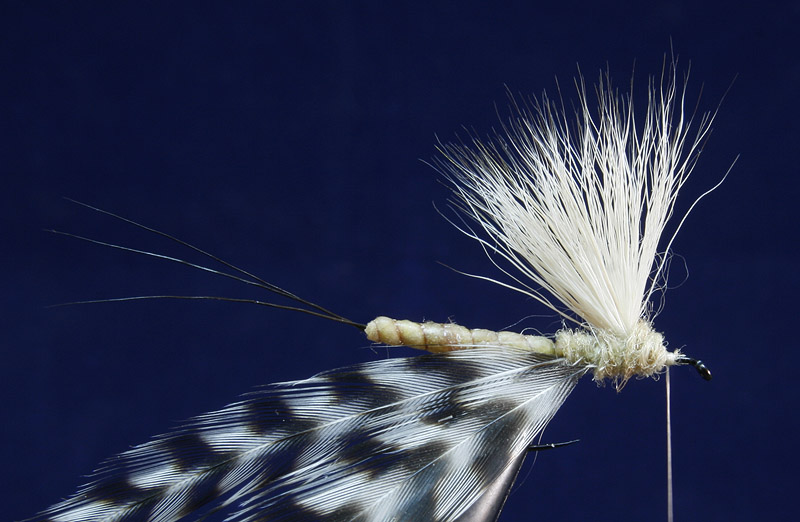
Step 9: Taking a long fibred hackle from the same cape tie it in at the wing tie in point and wind on three or four turns moving slightly forward as you wind. The ideal hackle will have nice stiff ending barbs that are a little softer at the root allowing the hackle to be pulled back slightly at the next tying stage without being on too stiff a base, very slightly open turns of hackle will also help this.
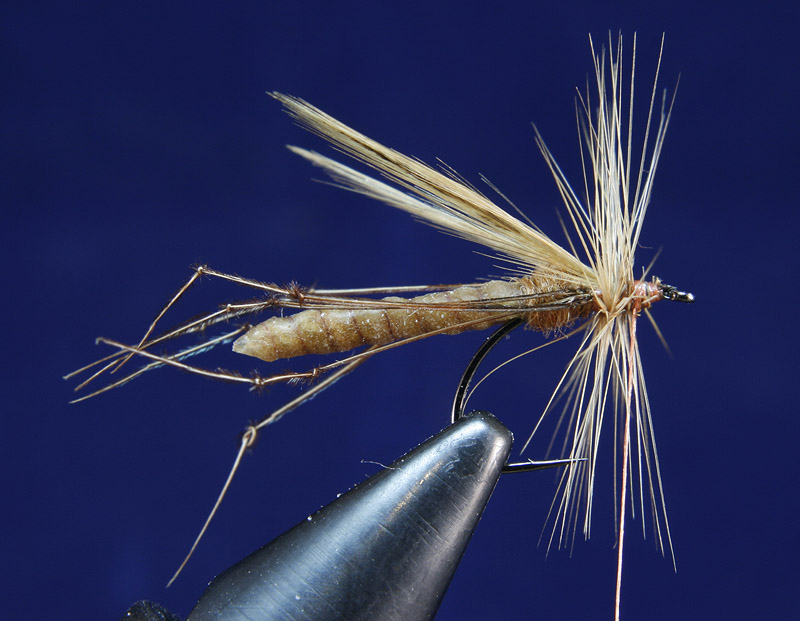
Step 10: Apply a half hitch or single turn whip to ensure the bound down hackle will not come loose when you take pressure off the thread. Releasing thread pressure a little allows this type of thread to be very easily split so after making a nice even split in the thread loosely place some of the same dubbing used before into the thread before spinning your bobbin.
Step 11: Pulling back the hackle fibres slightly wind on your dubbing to form the thorax, slightly overlapping the root of your hackle will hold the hackle fibres at a slight backward angle and make for a much kinder footprint when fishing the finished fly. On the rivers and small stillwaters I fish I’ve found this to be the best profile but if you will be fishing these flies on bigger wilder waters and anticipate having to pull the fly through bigger waves you should use a shorter but stiffer hackle and wind the thorax dubbing up to but not over the hackle roots.
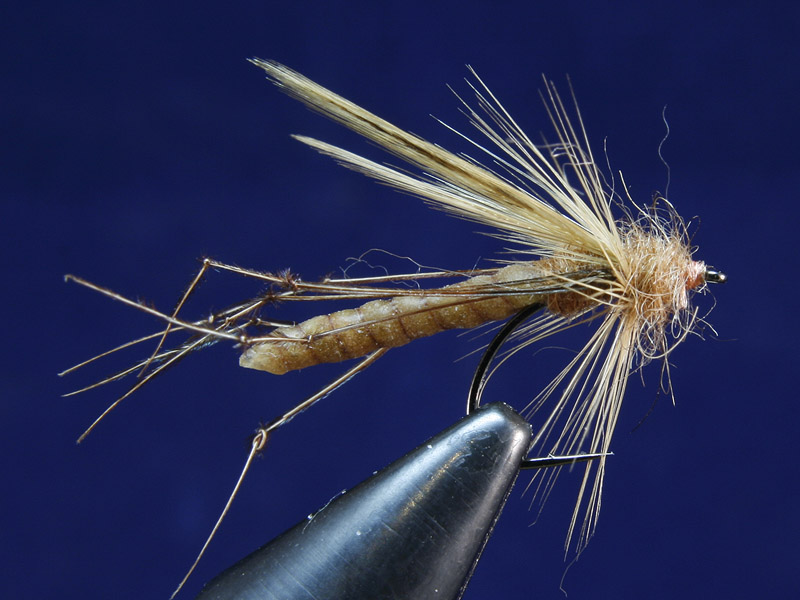
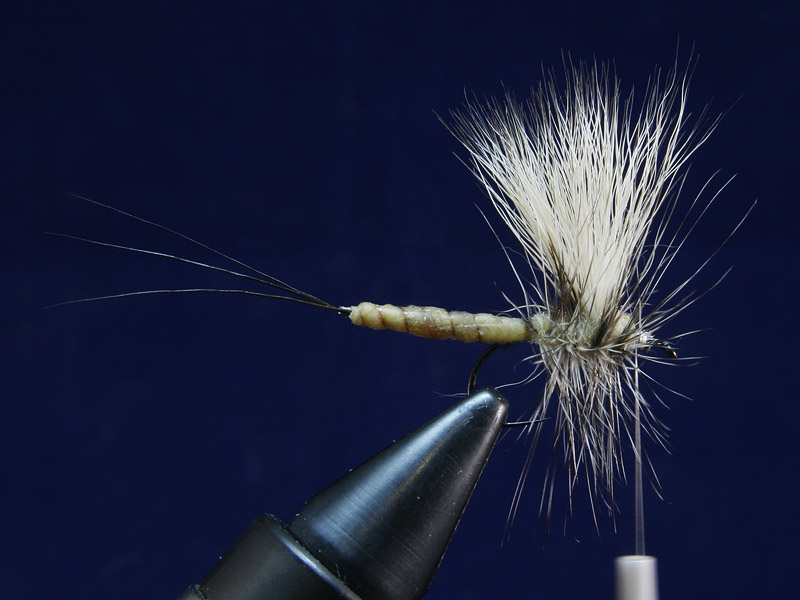
Step 12: Using an old toothbrush rough out the thorax dubbing so that the fibres mix through the hackle leaving a more chaotic halo when the fly is fished.
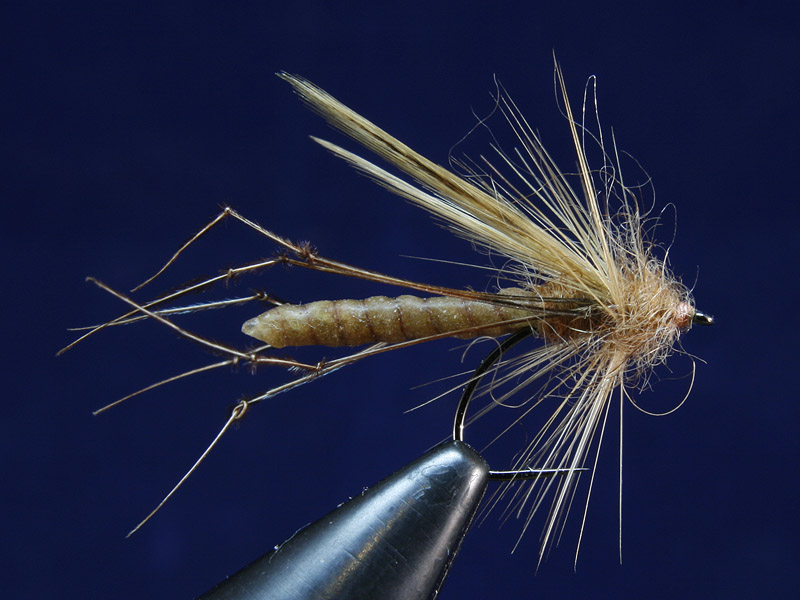
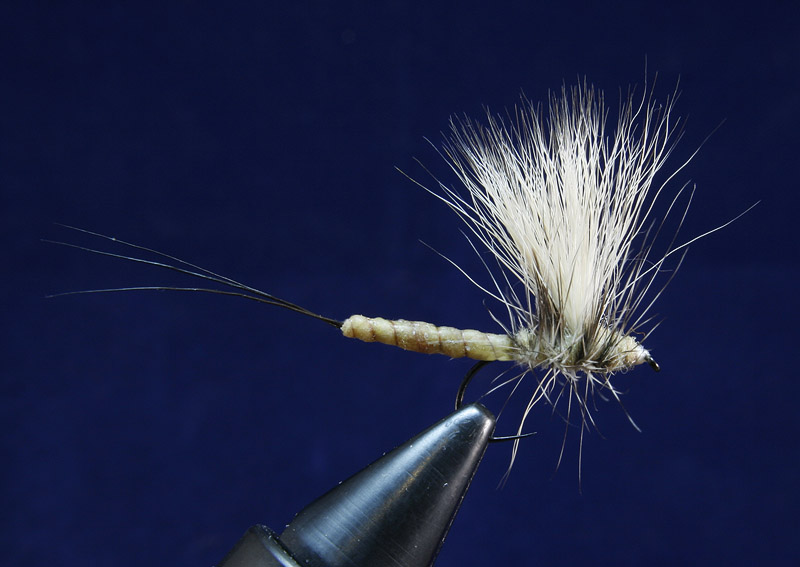
The completed fly from above.
Floats like a cork due to the longer hackle fibres and the make up of the extended body while the body type also adds a lot of durability to the fly with being stiff. The hook may also look a little fine if you are planning to use this fly for large Lough Trout but I am a big fan of this hook, its a great profile for many types of flies and is a lot stronger than it looks. I have yet to lose a fish on these due to hook failure and have landed everything from tiny Trout on small burns to 24 inch huge finned Brown Trout on a local stillwater without any problems. On that stillwater this is my “go to” fly.
Quick and Dirty Danica
Hook: TMC 103 #11.
Thread: Nano Silk, white.
Body: Copydex extended body.
Hackles: 2 Grizzle Cock.
Wing: Bleached Coastal Deer Hair.
Thorax: Any dubbing coloured just a little darker than the extended body.
Step 1: Following the instructions listed for the Daddy pattern prepare and tie in your extended body. When making the angled cut on your extended body check the orientation of your tails and make your cut so the three tails will be horizontal rather than on top of each other when the body is tied on. Next tie in your two hackles. One hackle will be shorter fibred than the other and used to aid flotation of the fly, the other will be long fibred and used only to increase the footprint size and help a little with stability. The shorter fibred hackle should be tied in at the extended body’s second tie in point with the longer fibred hackle a few millimeters in front of that.
Step 2: Move the thread forward a little and tie in a bunch of bleached Coastal Deer fibres, first preparing the Deer hair by removing the underfur and stacking it to even off the tips. After tying in take a few posting turns around the Deer Hair roots to prevent it forming an arc too far around the hook shank.
Step 3: Dub the full thorax area from the extended body tie in point to a few millimeters behind the hook eye. You can use any dubbing you like, here I have used Camel dubbing mixed with a little Antron and softened a little with natural Kapok to dub a slightly tighter base for the hackle to be wound over.
Step 4: Wind forward both hackles in open turns. I start with the shorter fibred rear hackle then wind the longer one through that making sure I trap down as few fibres as possible on the way.
Step 5: Add a little more dubbing in front of the hackle before forming a small head with your whip finish. Finally trim your hackle to a very wide V underneath the hook shank to complete the fly.
I’d love to say this fly has caught me loads of Trout but it hasn’t, we get virtually no Mayfly on the home rivers I fish most often so this fly is pretty much untested. It’s really listed here as an afterthought to show you some of the flexibility you can have with the extended body style from a previous blog post. Hopefully in the coming year I’ll get to test it properly.
If you decide to give it a go I’d love to hear your feedback both good and bad.
Jim