
The most effective dry fly is the one you can see. That statement came up in a conversation amongst a few friends a while back, it wasn’t me who said it but I wholeheartedly agree. What was meant by that was if you can see your fly as it drifts then you can see whether it’s dragging or not.
Of course thats just one of the benefits, I couldn’t count how many fish I’ve put down over the years striking into a rise that was actually to a natural where I thought my fly might be…. but it wasn’t. I can also use that as a cover up or excuse to myself when actually one of the primary reasons this is my “go to” spinner pattern is that, like us all, I’m getting a little older and my eyesight is not as great as it once was. Since the bulk of my spinner fishing happens as the light starts to fade the high vis post makes a world of difference.
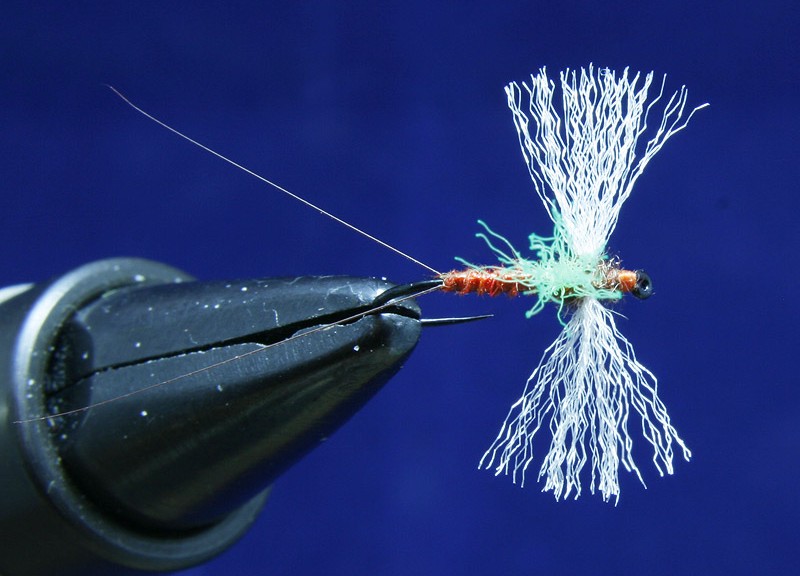
High Vis Spinner
Hook: Dry fly hook of your choice #20-12.
Thread: Sheer 14/0 Orange.
Tails: Microfibbets, colour is not that relevant.
Rib: Hends Body Quills, Reddish Brown (BQ-22).
Post Wing: TMC Aero Wing, Fl Green. For #18 and below use Fine Aero Wing.
Spent Wings: TMC Aero Wing, White. For #18 and below use Fine Aero Wing.
Abdomen: Reddish Brown Dubbing (Mostly Red). I’m using my own mix of Beaver.
Thorax: Reddish Brown Dubbing (Mostly Brown). I’m using my own mix of Beaver.
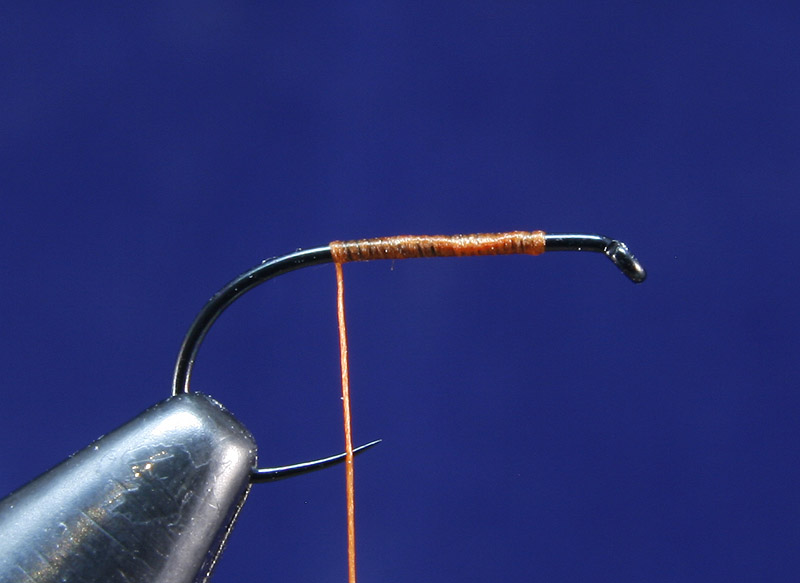
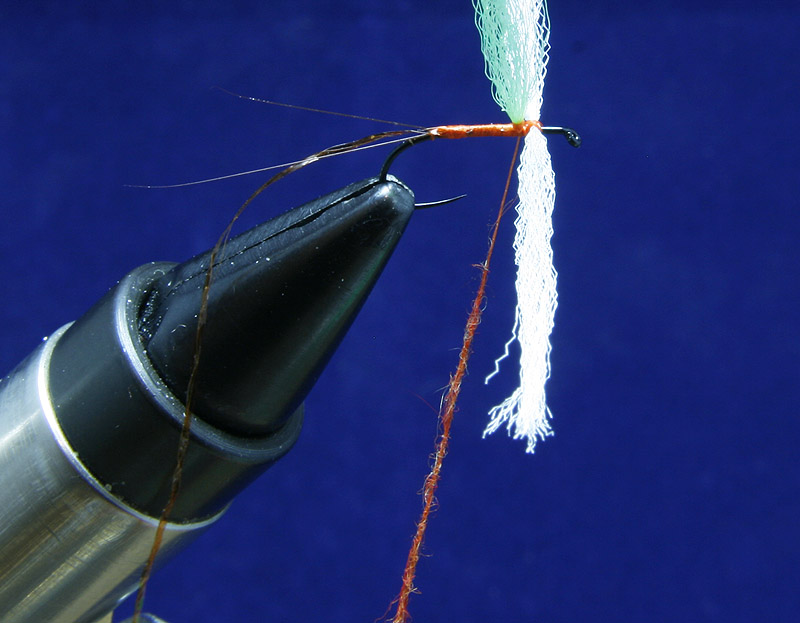
Step 1: Attach your thread leaving a gap at the eye and wind an even layer over the shank to a point just before it bends away. When attaching your thread keep a minimum of three inches of thread in your non bobbin hand and use this to guide your wraps down the shank evenly, when cutting off this spare thread keep it to the side as you’ll use this at a later stage to split your tails.
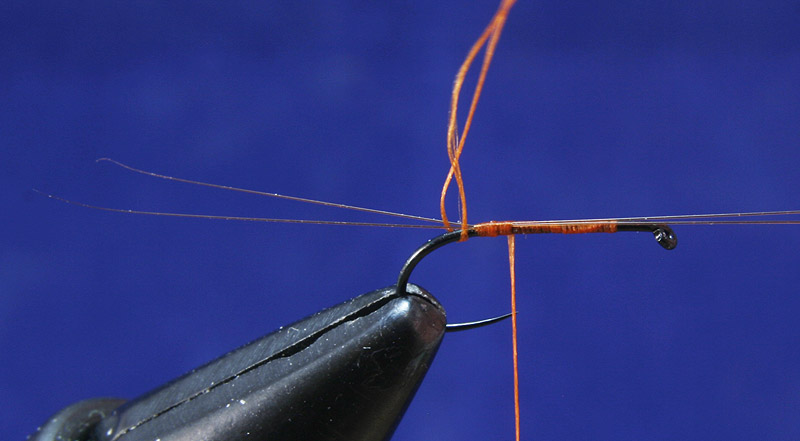
Step 2: Tie in two or three tails roughly twice the length of the body, the quantity of tails depends on the species of fly you are trying to imitate. Make sure your tails are on top of the hook shank to ensure a nice even split and return the thread a few turns back up the shank, this will make it easier to tie down the thread used when splitting the tails.

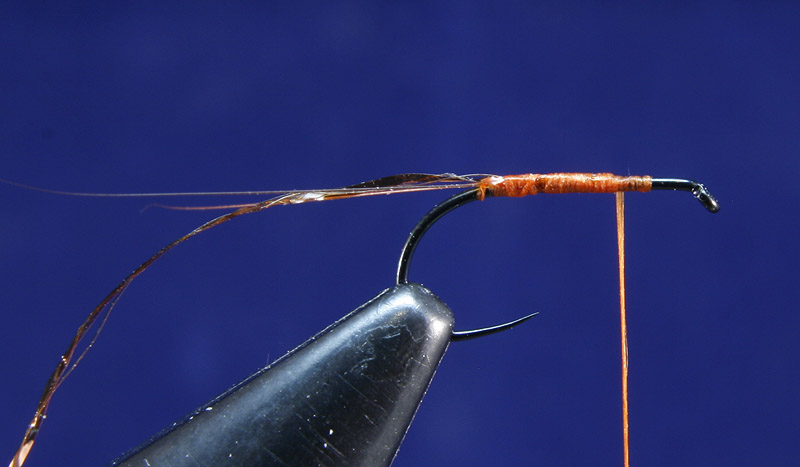
Step 3: Use your thumb nail to gently push up below the tail root and seperate your tail fibres. When you have a split take the piece of discarded thread from earlier and fold it around the bend of the hook before bringing both loose ends up between your tail fibres and binding them to the top of the hook shank. Take turns of thread towards the tail root as you bind this thread down, if you are very gentle you can manipulate the tension on the tail splitting thread to widen your tail split but once you have tied a few of these flies you’ll find you get the tension right without the need to manipulate further.
Step 4: Tie in your rib as you wind the thread forward to a point just behind the final position of your spent wings. It is much easier to position your post wing behind your spent wings and it also helps prevent your fly from being front heavy.
Step 5: For your post wing take a length of Aero wing half the thickness of your final post wing density, this is much less material than you’d think you would need. Aero Dry Wing generally seperates itself into 4 roughly even sections, for the post wing you’ll only need half of one of those sections or slightly less than that in smaller sized flies. Use only one or two tight turns to bind the material on top of the shank, all further thread turns should be around the base of the Aero wing and above the shank. You wont be winding a hackle around this post so theres no need to travel the thread too far up the wing, just enough to make sure the wing stays posted.

Step 6: For your spent wings you wont be doubling over the wing material so you need a thicker bunch but be careful how much you use as its very easy to overdress this part of the fly. As a rough guide where the Aero wing on the card seperates itself into 4 sections you’ll only need one of these at the most, as the hook size gets smaller I’ll remove more material from the wing bunches. To attach the wing I take one turn of thread to hold the wing on top of the shank before pulling the materials round to form a cross with the hook shank and make figure of eight wraps around the wing to hold it tighly in place. After tying in the wing wet your finger tips and roll the wing material between them for both sides of the spent wings and the post, this will keep all the Aero wing in tight bunches and make it easier to tie in and wrap the rest of your materials without trapping any stray wing fibres.

Step 7: Take a very small amount of dubbing and add it to your thread. I do this before winding the thread back to the tail as its easier to add your dubbing tidily if you have a thread gap between the end of the dubbing and the hook shank and I use this gap to wind the thread back to the tail before forming the body ensuring the thread is in exactly the position you want it in just as the dubbing starts. Yeah you can slide your dubbing noodle up the thread but this can take away some of the fine taper you naturally get when making your dubbing noodle and it can also loosen the dubbing a little so why take the chance?
Step 8: Wind your dubbing noodle up the hook shank finishing just at the root or just in front of your post wing. Keep the body slim and as even as you can make it.
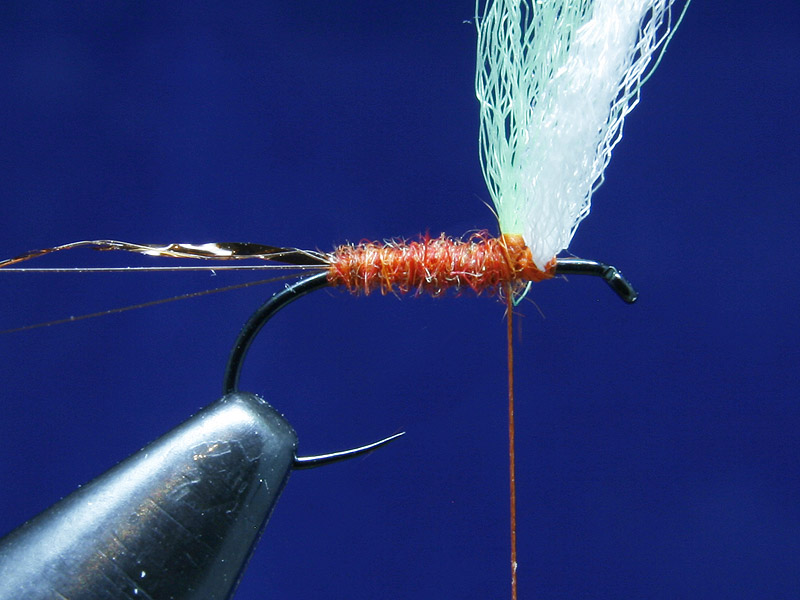
Step 9: Wind up your rib in close but not touching turns, finishing just behind your spent wing. The effect to go for here is for your rib to look like the body and your dubbing to look more like a rib.
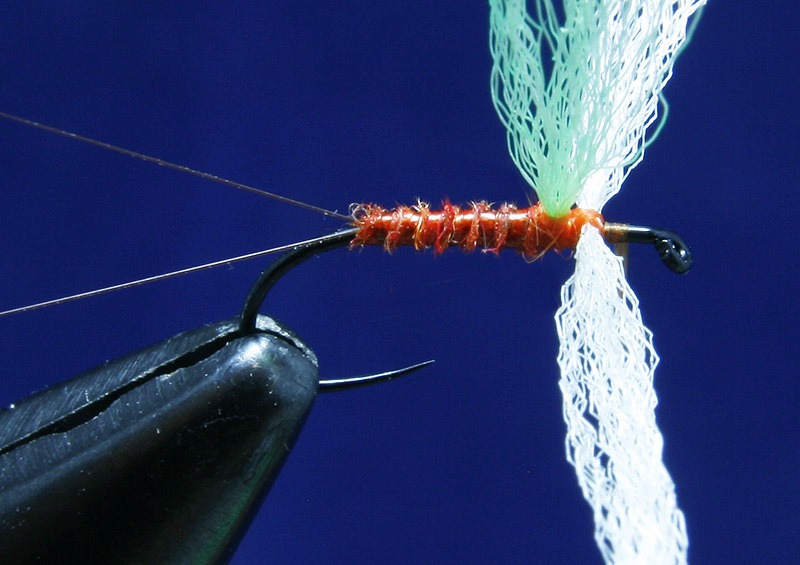
Step 10: Taking the darker, more brown, dubbing wrap figure of eight turns around the spent wing to form a thorax that is slightly more bulky than the abdomen of the fly. The lighting in these photographs doesn’t show it too well but the thorax dubbing is actually darker than the abdomen, especially when wet.
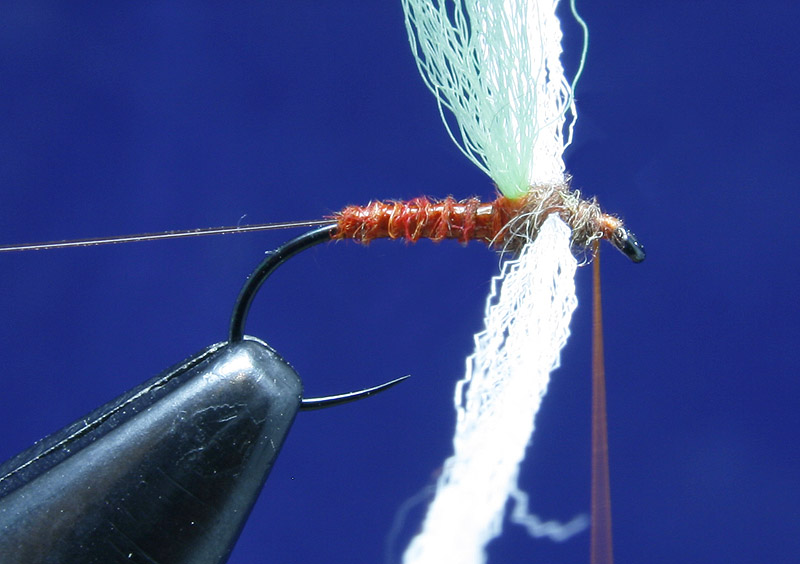
Step 11: To finish the fly make a small head as you whip finish and trim all three wings to length. The easiest way to get a good wing length is to pull all three wings back and trim them with a single cut just behind the end of the body, take great care doing this to ensure you dont cut off any of your split tails. Pushing the wing back into position will seperate all the wing fibres and at this point you can make more cuts to add more shaping to the wings, they’ll look nicer in your box but in my opinion it does the fly no good and it’ll fish better if you leave them as they are.
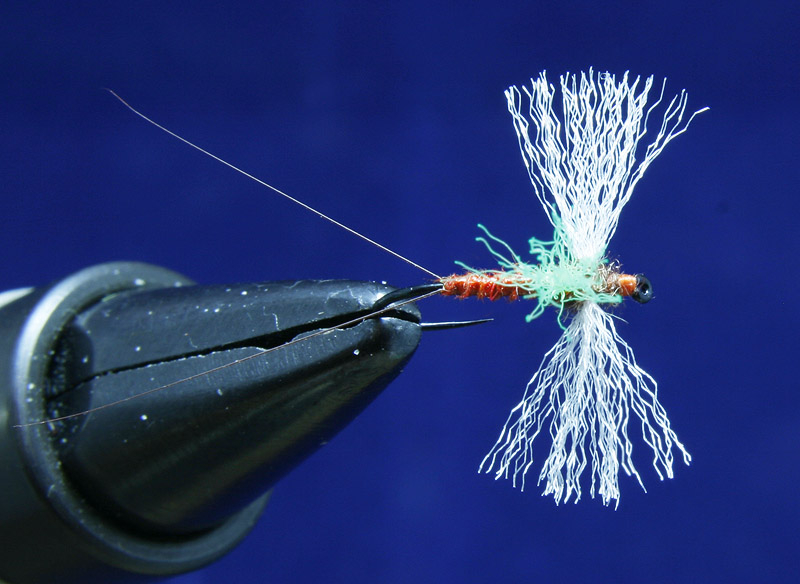
Side view: The completed fly viewed from the side.

Without the high vis post this is still a very effective fly so feel free to leave it out if you choose, if you have really good eyesight or you fish your spinners while the light is still good you might not need the post at all but I’ve found it gives me an extra half hour or so of fishing into the dusk where I can still see the fly. It’s also a good experiment to mix up your post colours, Fluoro Green suits me and the waters I fish most often but it may turn out you can see a Fluoro Pink or Orange better or if the water you fish is glassy and grey with the last light there may even be times a Black post will stand out better. Just tailor it to suit your own needs.
Good luck and I’d love to hear how you get on fishing this fly.
Jim